1. Enable Ldap
LDAP is only available in the Enterprise License. If the correct license is installed, you can enable it in portal by going to Settings -> Authentication and pressing the Edit button behind LDAP.
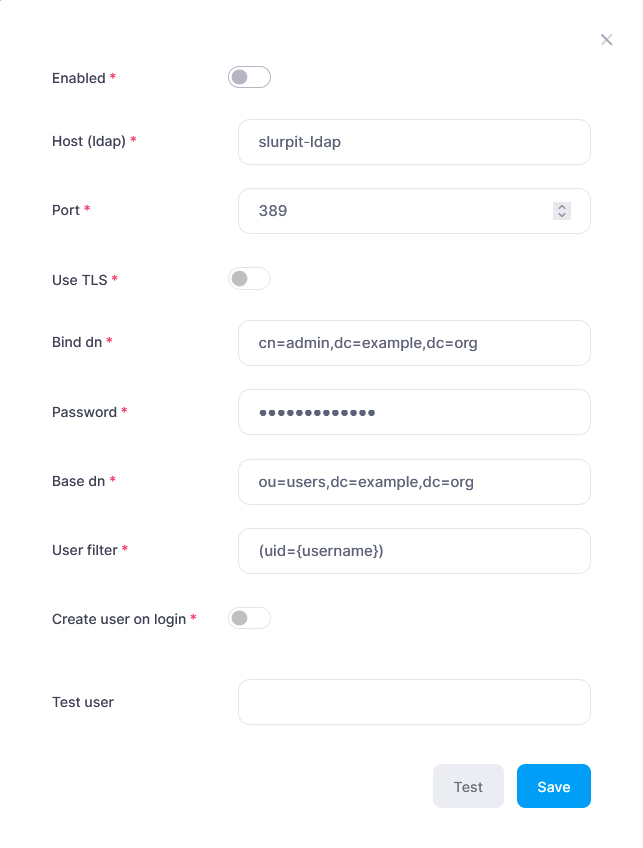
In the following screen you can enable ldap and fill in your information
2. TLS
To enable TLS on the server, a ca.pem file needs to be added to the container. You do this by making a volume of /usr/share/ca-certificates and putting the file there. If you are using docker compose, you can do this by adding
– ./certs:/usr/share/ca-certificates
to the volumes of slurpit-portal.
3. User filter
By default the User filter is setup to work with OpenLDAP, they use uid to store the username. If you are using Microsoft AD, this will usually be (sAMAccountName={username}). If your ldap users have a suffix or prefix, you can also add them there. For example, you company has @company-name added to all usernames, you can have (uid={username}@company-name). This way the users won’t need to add the suffix when logging in.
To test if your filter works, fill in a username and press Test and it will try to find the User in your ldap. If no user is filled it, it will only test the connection parameters and see if it can connect.
4. User creation
4.1 Manual
In Administrator > Users, you can add a new User. Here you can choose if it’s a Local or LDAP user. If LDAP is chosen, the user will only be able to login with LDAP verification.
4.2 Automatic
In the LDAP settings you can also toggle `Create user on login`. Which means that the username/password wil also be checked against ldap and if its succesful and the user does not exist yet, it wil automatically create a user for it.